Setting up python remote debugging is well documented on VS Code documentation. Here are the missings steps to help you debug code running on a Raspberry Pi, or another device, as long as it runs docker !
First, I created a sample app : src/app/__main__.py :
#!/usr/bin/env python3

message="hello world"
print(message)
Nothing fancy !
setting up local debugging
After installing Visual Studio Code, the Python extension, and python3, I created a .vscode/launch.json file. Note the paths pointing directly to the __main__.py file :
{
    "version": "0.2.0",
    "configurations": [
    {
        "name": "Python: Local",
        "type": "python",
        "request": "launch",
        "program": "${workspaceFolder}/src/app/__main__.py",
        "cwd": "${workspaceFolder}/src/app"
    }]
}
And a .vscode/settings.json file, to tell VSCode which python version to use :
{
    "python.pythonPath": "python3"
}
MacOS users : you cannot use the installed python, per the VSCode doc.
I’m now able to put a breakpoint and debug the code locally :
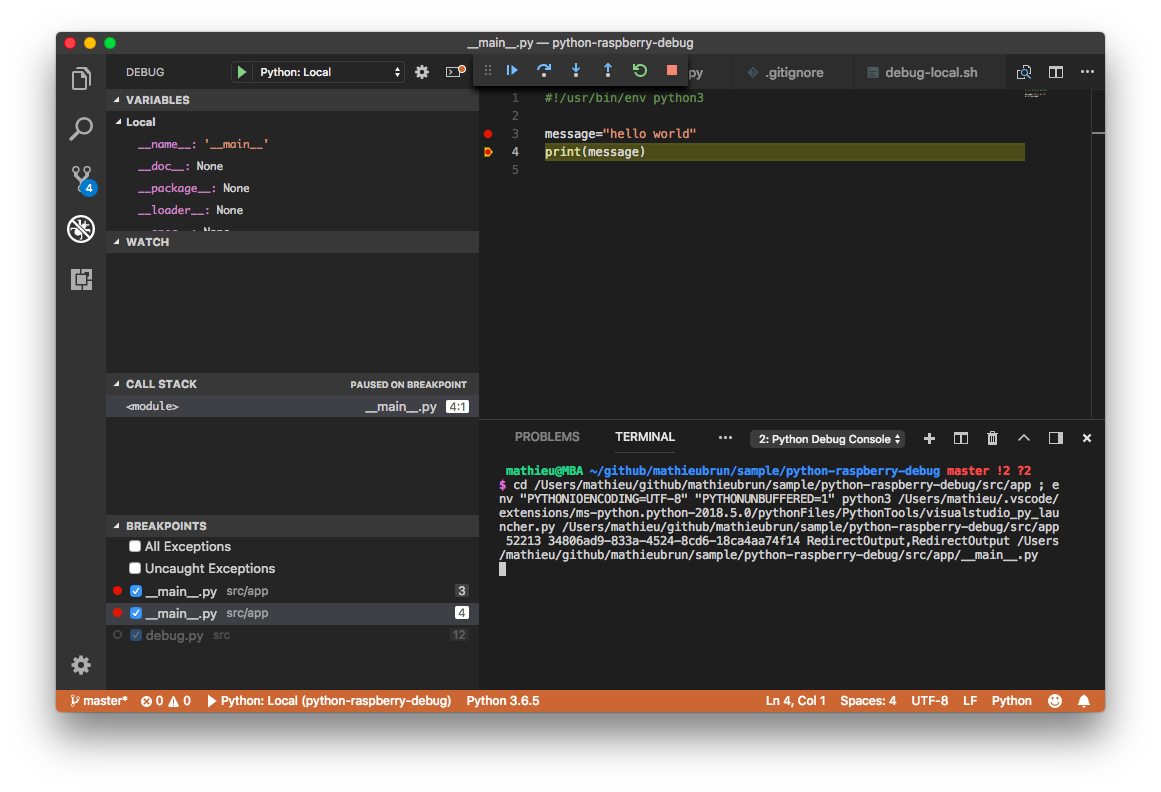
So far, so good, the easiest part is done.
setting up remote debugging on a docker container
I created a Docker image based on rpi-raspbian by resin.io. I tried using the Alpine image, but it was lacking the smbus packages required to interact with GPIO using python.
For remote debugging, ptvsd version 3.0.0 must be installed on both the client and server. The 3.0.0 version is important : as of today, later versions are not yet supported.
If you’re running MacOS, you may be out of luck at the moment because of this bug.
I executed the following on my development machine :
pip3 install ptvsd==3.0.0
I also added some bootstrapping code in src/debug.py as the VS Code remote debugger needs an enpoint to attach to.
#!/usr/bin/env python3

import ptvsd
import time
import os
import sys

print("Waiting to attach.")

address = ('0.0.0.0', 3000)
ptvsd.enable_attach('my_secret', address)
ptvsd.wait_for_attach()

# wait a little bit for debugger to attach on client
# https://github.com/Microsoft/vscode-python/issues/819#issuecomment-366540663
time.sleep(3)
print("Done waiting. Starting program.")

import app.__main__

print("Done debugging.")
I needed a Dockerfile as well :
FROM resin/rpi-raspbian

RUN apt-get update && \
    apt-get install -y \
        python3-minimal \
        python3-pip
    && rm -rf /var/lib/apt/lists/*

WORKDIR /src

RUN pip3 install ptvsd==3.0.0

COPY . /src/

ENTRYPOINT [ "python3", "app/__main__.py" ]
Lastly, I added a new entry to the launch.json file to enable the remote debugger :
{
    "name": "Python: Attach to Pi",
    "type": "python",
    "request": "attach",
    "localRoot": "${workspaceFolder}/src",
    "remoteRoot": "/src",
    "port": 3000,
    "secret": "my_secret",
    "host": "raspberrypi.local"
}
Note : the remoteRoot refers to the path in the docker container.
Now, I can copy eveything to the pi :
scp -r . pi@raspberrypi.local:/home/pi/test
And after connecting via SSH, build the image and run the container :
 pi@raspberrypi ~
$ cd test/
 pi@raspberrypi ~/test
$ docker build -t test-pi src
Sending build context to Docker daemon  17.92kB
Step 1/6 : FROM resin/rpi-raspbian
 ---> f542b3baa5b3
Step 2/6 : RUN apt-get update &&     apt-get install -y         python3-minimal         python3-pip &&     rm -rf /var/lib/apt/lists/*
 ---> Using cache
 ---> 12c9a493fc76
Step 3/6 : WORKDIR /src
 ---> Using cache
 ---> 5362e45a23e6
Step 4/6 : RUN pip3 install ptvsd==3.0.0
 ---> Using cache
 ---> 9565f1aecee1
Step 5/6 : COPY . /src/
 ---> da75022908c1
Step 6/6 : ENTRYPOINT [ "python3", "app/__main__.py" ]
 ---> Running in 90e92722dbfc
Removing intermediate container 90e92722dbfc
 ---> c9506a870443
Successfully built c9506a870443
Successfully tagged test-pi:latest
 pi@raspberrypi ~/test
$ docker run --rm -ti -p 3000:3000 --entrypoint "python3" test-pi debug.py
Waiting to attach.
And then, attach to the remote debugger.
using public key authentication
I did not want to type the Pi password each time, so I generated a ssh keypair without passphrase, per the guide on raspberrypi.org.
And that’s it!
The source repository for this article is on Github.